This time we’ll be going through the process of how to make a stylized tree in Blender.
You’ll Learn how to Model the actual tree from scratch, how to apply the specific materials in the Shader Editor, and setting the scene up for the final render!
This Tutorial will be divided into 3 parts:
- Modeling 3D Tree in Blender
- Applying colors to the Tree
- Setting the Scene up
Let’s dive right into it!
Get creative with these Essential Blender Addons!
Modeling 3D Tree in Blender
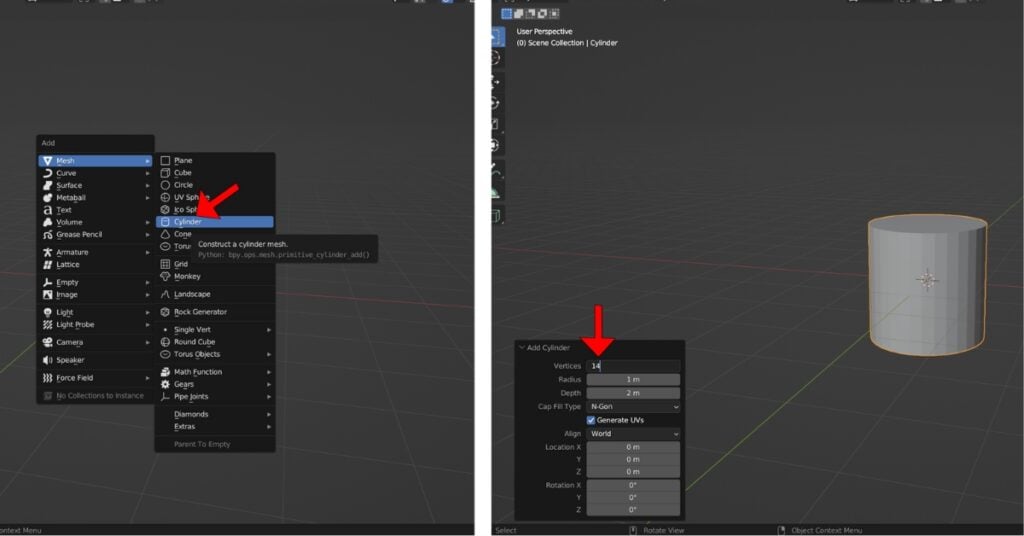
Add a Cylinder to the viewport with (SHIFT+A), navigate to the bottom left “Add Cylinder” Tab, and change the Vertices to 14.
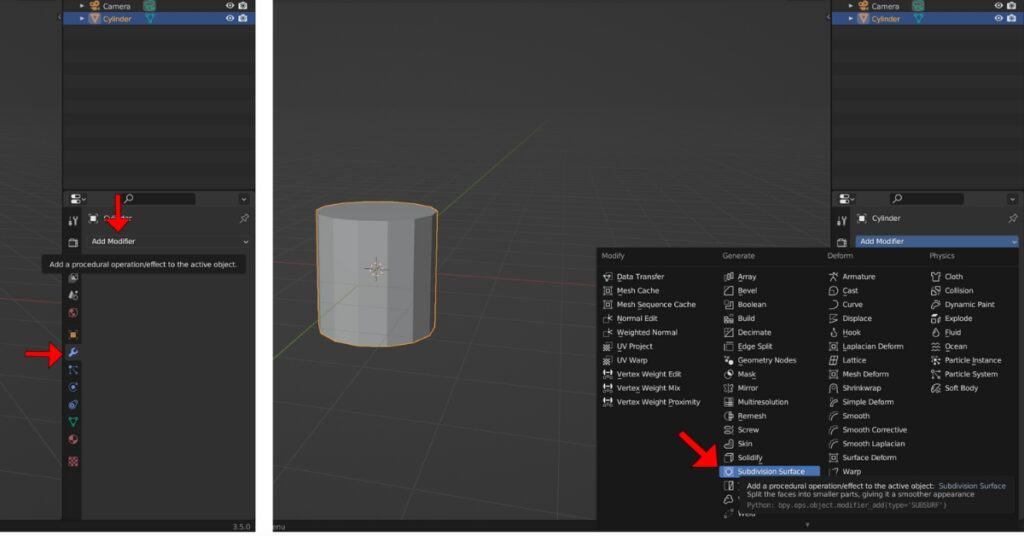
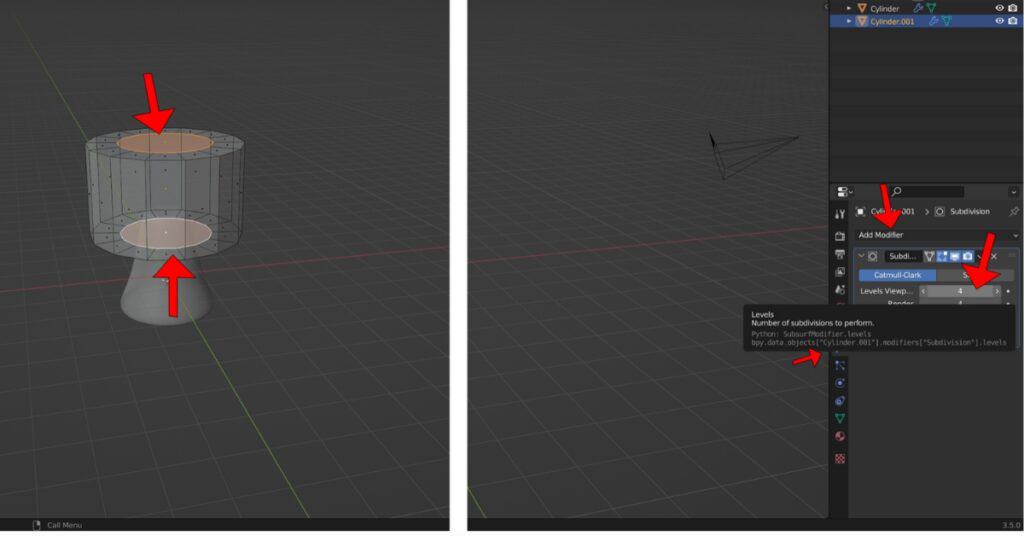
To the right, you’ll find the Modifiers Tab, select “Add Modifier” and choose the “Subdivision Surface” Modifier
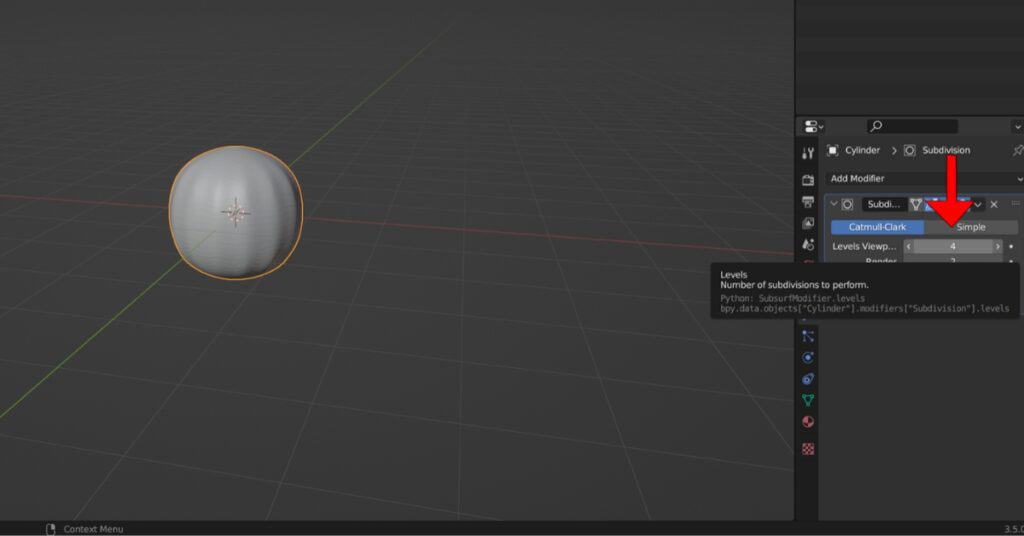
Increase the Number of Subdivisions and Render to 4.
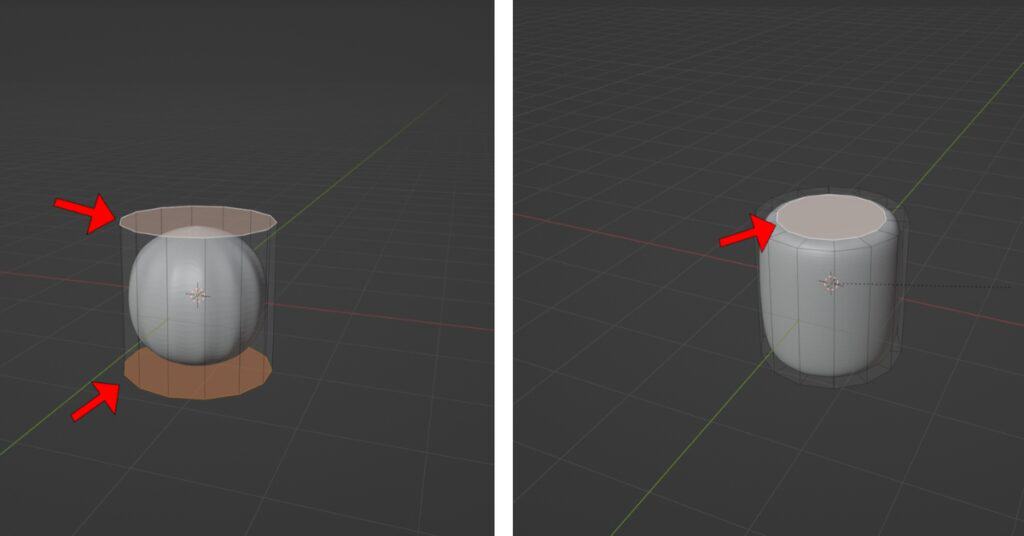
While selecting the cylinder, enter Edit mode by pressing (TAB) and choose both the top and bottom Faces (Press 3 for face selection mode). Then, inset them by pressing (I) and moving the mouse.
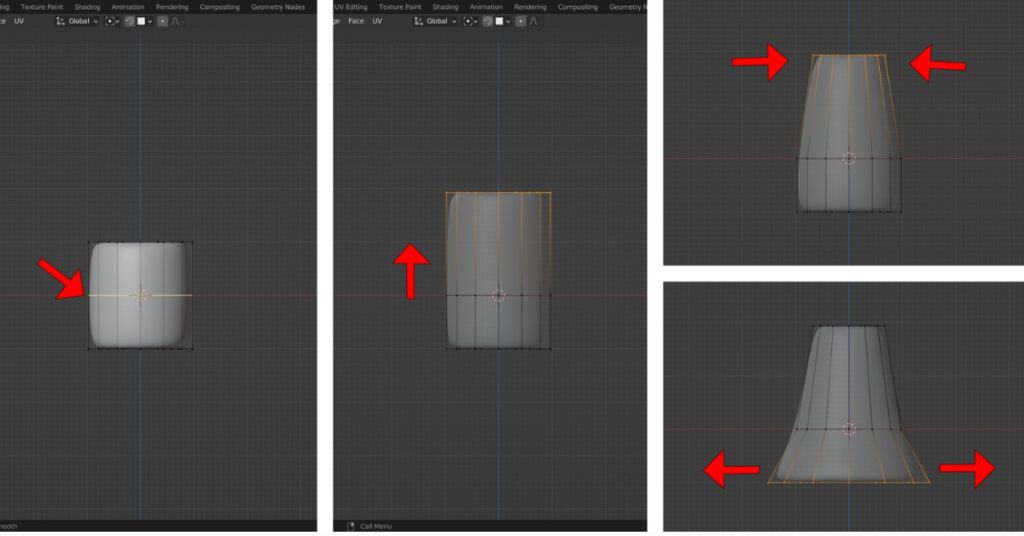
For the Tree Trunk; go to the front viewport view (Numpad 1) Add a loop cut to the center of the cylinder, then switch to X-ray mode (ALT+Z) and select the vertices at the top. Use (G+Z) to move the selection along the Z-axis and scale it down using (S). Next, select the bottom vertices and scale them up.
Add another cylinder, scale it down along the Z-axis, and then scale it entirely.
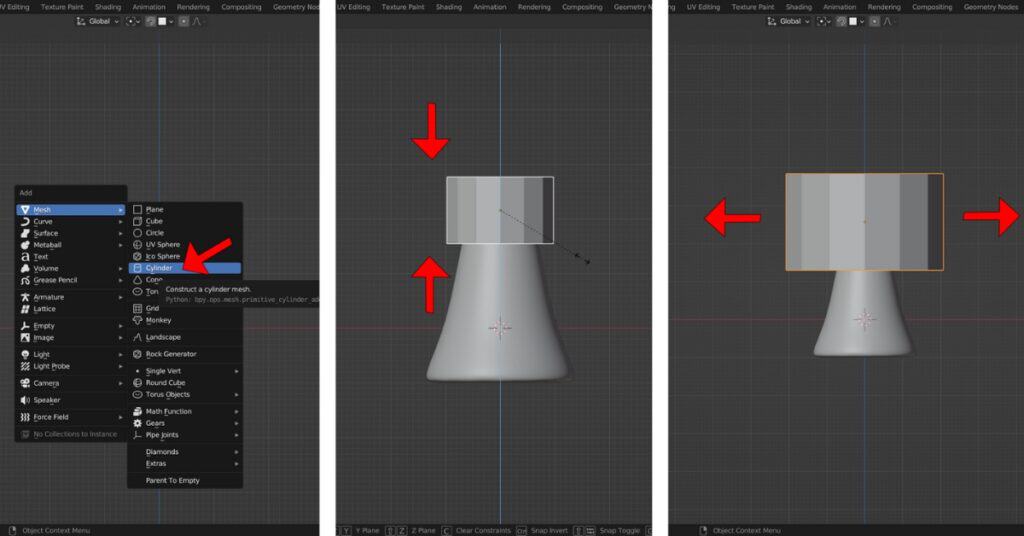
Inset the top and bottom faces. Next, add a “Subdivision Surface” modifier and increase the “Viewport” and “Render” levels to 4.
Scale down the top vertices, add a loop cut in the middle, and scale up the bottom vertices.

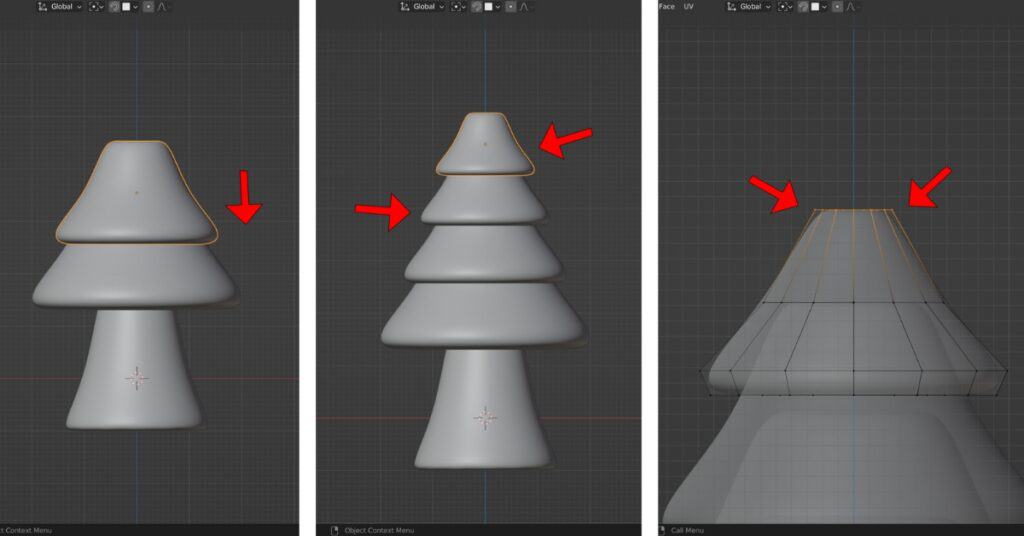
Apply scale to the new object (CTRL+A > Scale). Next, select the bottom edge loop (double-click on a connected edge) and bevel it. Afterward, duplicate it (Shift+D) and position the duplicate above.
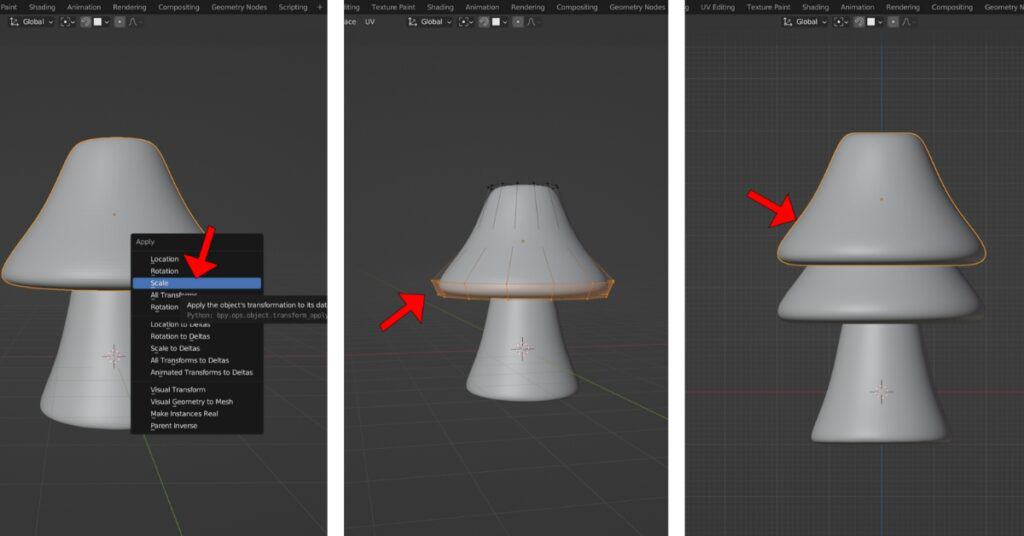
These will serve as the tree leaves. Scale down and position each duplicate correctly as you move upwards. On the fourth duplicate, scale down its top edge loop.
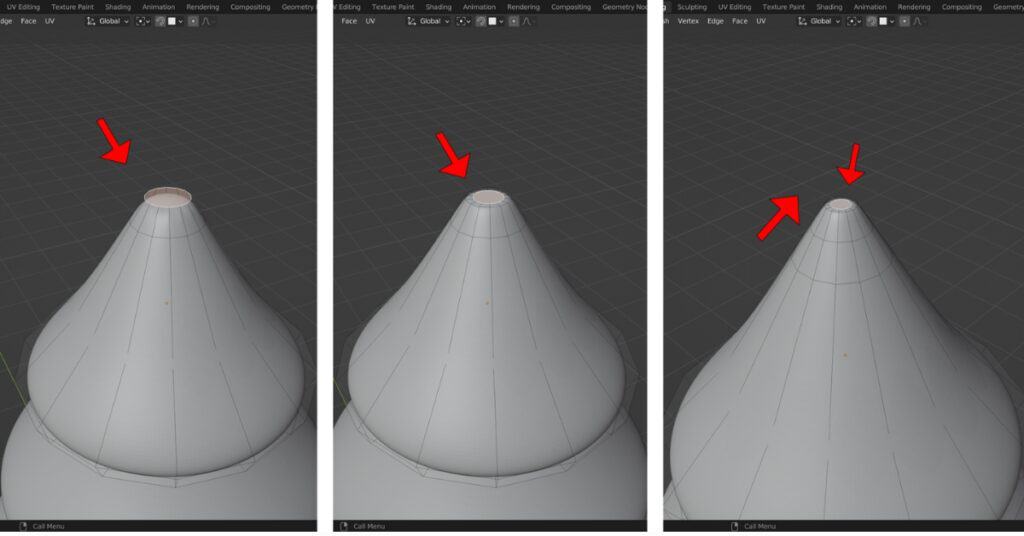
Inset the top face, then Grab it and move it up slightly along the Z-Axis.
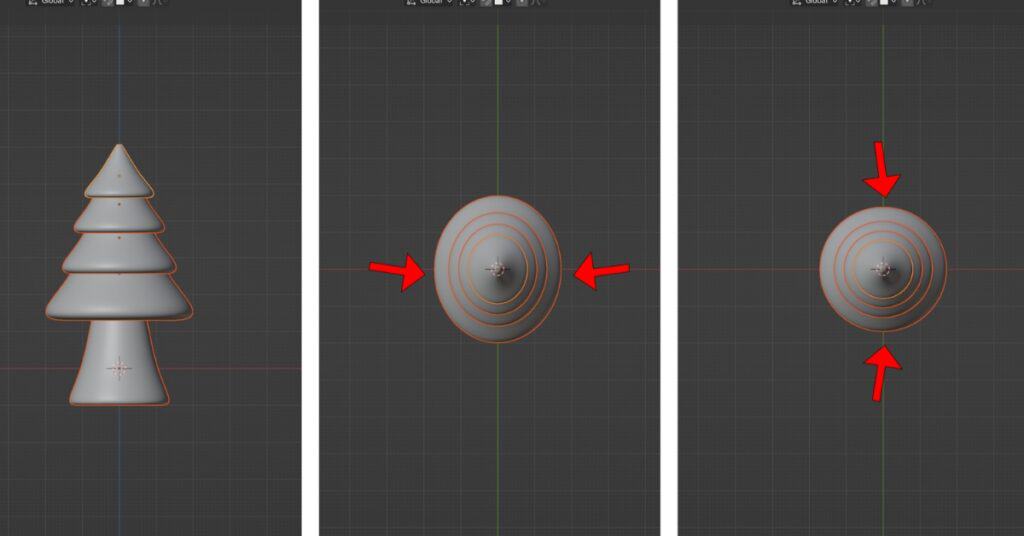
Select all the geometry that we have created, then go to Top View (Numpad 7). Scale it down slightly on the X and Y-Axis using (S+X) and (S+Y) respectively.
Applying Colors to the Tree
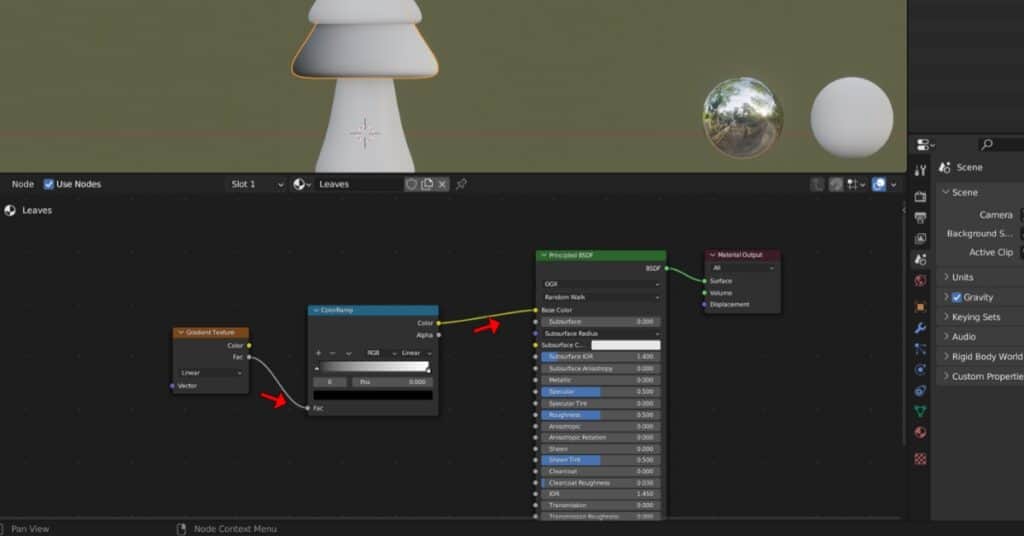
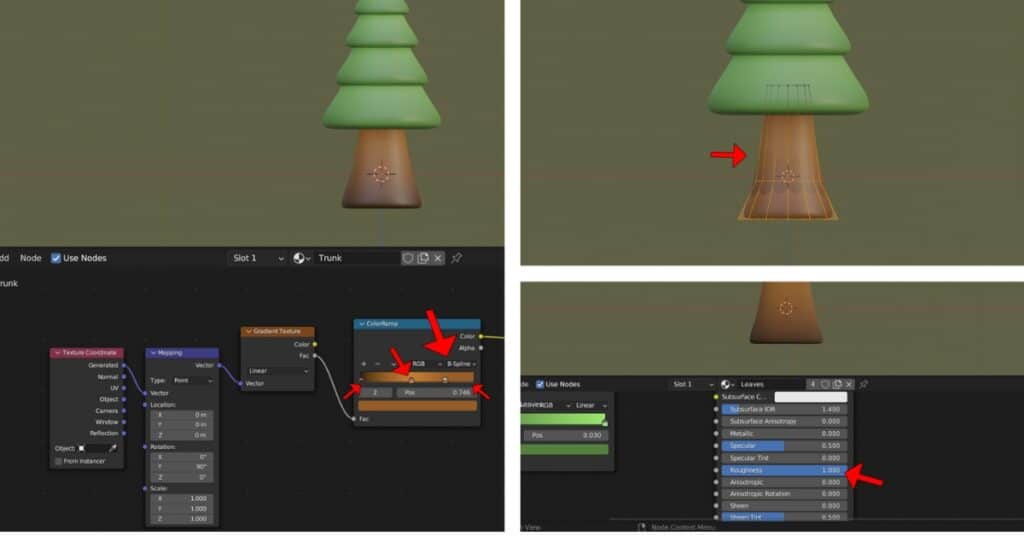
Go to the Shading Workspace at the top. Select one of the leaves and create a new material named “Leaves”. In the Shader Editor below, press (SHIFT+A) and search for both the “ColorRamp” and “Gradient Texture” Nodes, then place them.
Check out this tutorial on Making Grass in Blender!
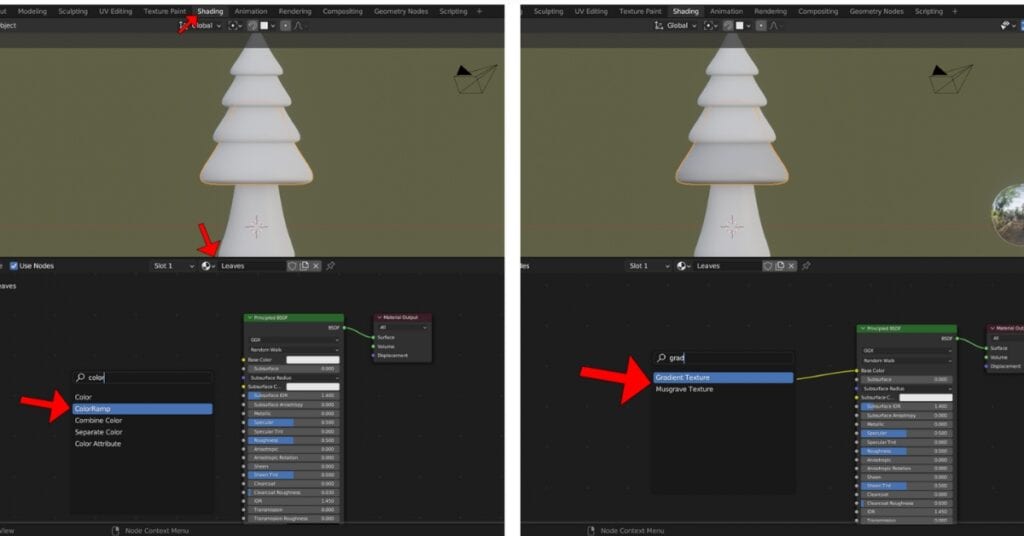
Connect the Color Ramp’s “color” output to the “Base Color” input on Principled BSDF,
And the Gradient Texture’s “Factor” output to the Color Ramp’s “Factor” input. This will allow you to add Gradual Color to the Selected Mesh.
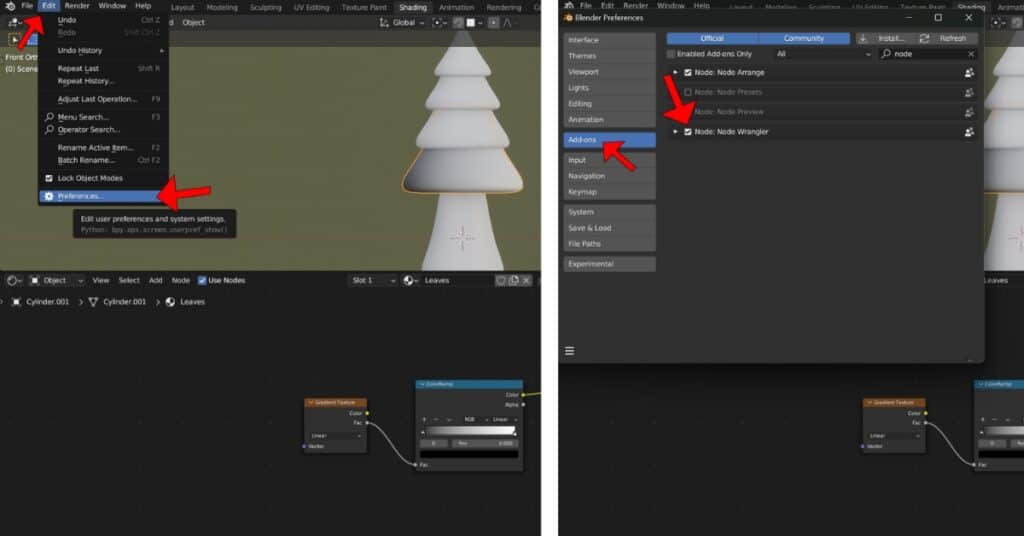
Navigate to the Preferences through the Edit tab. Click on Add-ons and activate “Node: Node Wrangler”.
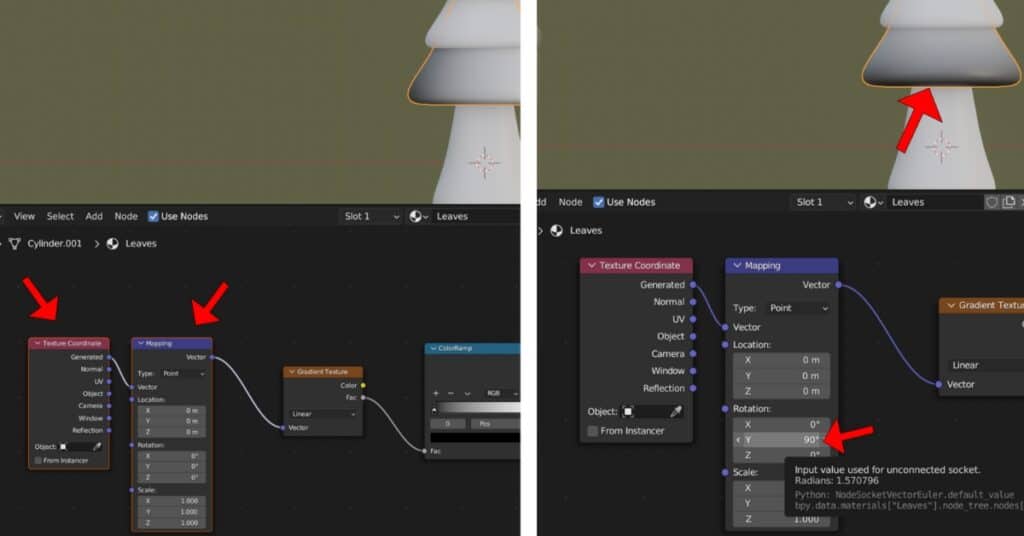
Select the Gradient Texture Node and press (CTR+T), this will connect two new nodes, Mapping and Texture Coordinate.
In the Mapping Node, Change the Y Rotation number to 90.
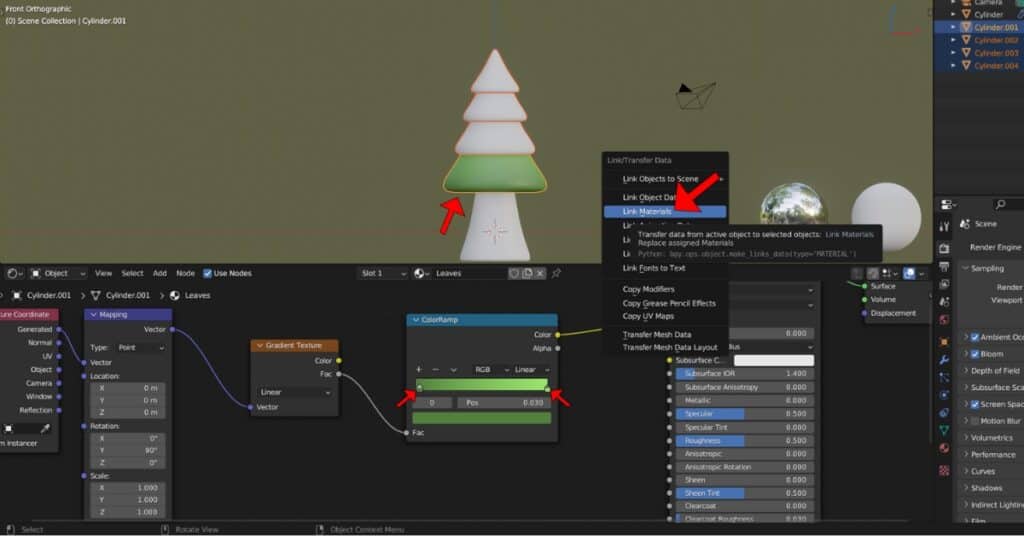
Change the white color on the color ramp to a light green and the black color to a darker green. Select all the leaf geometry, making sure to select the one with the material last, then
press (CTRL+L)>Link Materials to link the material to each piece.
Start Learning Blender with this list of Blender Lessons!
Select the trunk and add a new material to it. Repeat the same process, but this time change the color to brown. Add a new color square in the middle by (CTRL+Left Mouse Click), which can be a lighter brown. Adjust the trunk by making it smaller and increase the roughness of each material to 1.000.
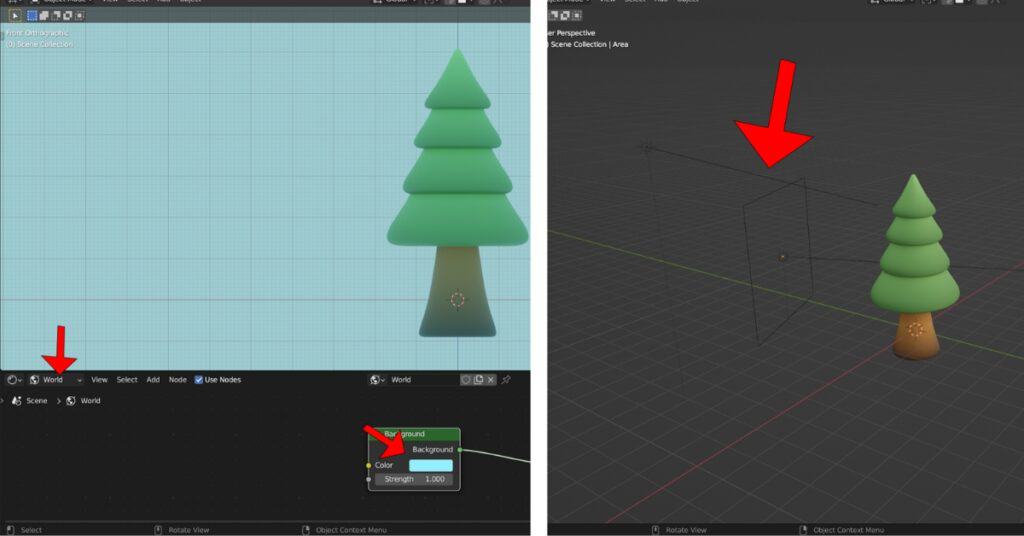
Setting the Scene up
Change the World Color to something resembling a sky color and add your Sun and Area lights (SHIFT+A). The process is essentially completed and the scene is now ready for rendering!
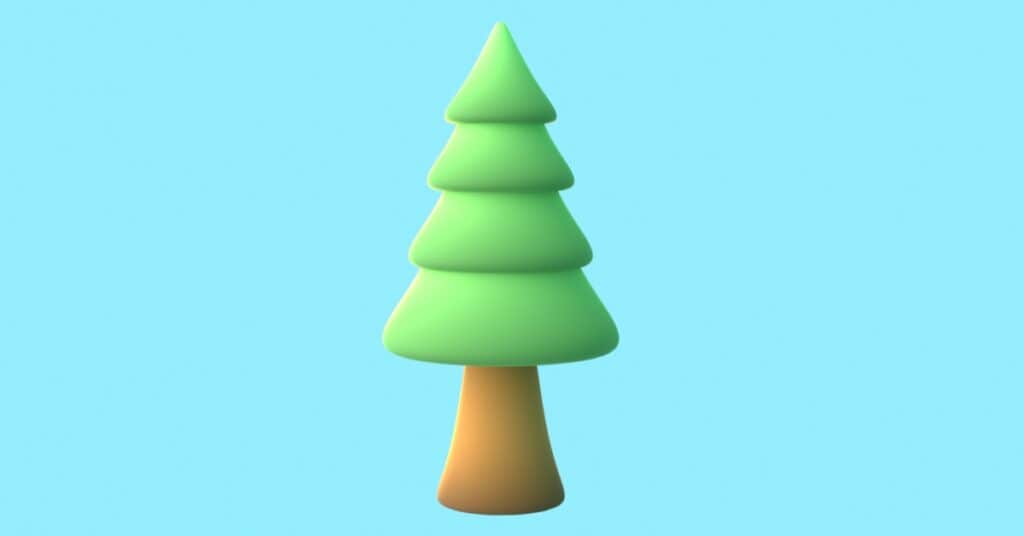
Thank you for considering following this guide. See you in the next one!
Check out this tutorial to learn How to Create a 3D Cup in Blender.
Interested in 3D artist jobs? Browse the latest openings at artblast.co/3d-artist-jobs.
Looking for a game art job? ArtBlast curates 10-60+ game art jobs daily. Subscribe at artblast.co/subscribe and apply while the role is still fresh.